
Need some help?
We got you covered
How to Videos

Setting Up Your JackRabbit MG Cargo

Setting Up Your JackRabbit MG Doble & MG Renegade

First Ride on Your JackRabbit MG

Setting up your JackRabbit OG2/OG2 Pro

First Ride On Your JackRabbit OG2/OG2 Pro

Setting up your JackRabbit XG/XG Pro

First Ride On Your JackRabbit XG/XG Pro

Setting Up Your JackRabbit OG

JackRabbit OG First Ride

Folding Your JackRabbit OG

JackRabbit Universal Travel Bag Setup
Getting Started
How do I set up my JackRabbit?
How do I set up my JackRabbit?
No assembly required! JackRabbits come fully assembled and can be set up to ride without any tools!
Before you ride, you should do the following:
For JackRabbit OG: watch this Set Up video
For JackRabbit OG2 & OG2 Pro: watch this Set Up video
For JackRabbit XG & XG Pro: watch this Set Up video
For JackRabbit MG Doble & MG Renegade: watch this Set Up video
For JackRabbit MG Cargo: watch this Set Up video
As covered in the Set Up videos, be sure to inflate the tires with air to the correct pressure, charge the battery, and attach the handlebars securely.
You’ll also need to set the proper saddle/seat height, put the foot pegs down, and test the braking and bell. Then you’ll be ready to learn how to ride!
Not sure which JackRabbit you have? Click this link to compare models.
How do I charge my JackRabbit?
How do I charge my JackRabbit?
No need to remove the battery to charge your JackRabbit! To charge, locate the charge port under the main rectangular frame of your JackRabbit, pop the charging cap open, and insert the round plug into the charge port. When finished, make sure to close the charging port cover. Be sure the charging port cover remains closed when not charging, especially when riding.
For JackRabbit OG: The charging port is under the frame and at the front of the bike, near the front wheel.
For JackRabbit OG2 & OG2 Pro: The charging port is under the frame at the rear of the bike frame. DO NOT attempt to charge your OG2 from the light ports on the side of the bike frame.
For JackRabbit XG & XG Pro: The charging port is under the frame at the rear of the bike frame. DO NOT attempt to charge your XG from the light ports on the side of the bike frame.
For JackRabbit MG Doble, MG Renegade & MG Cargo: The charging port is under the frame at the rear of the bike.
Then, plug your charger into a standard US 100-240V AC outlet. Please note that JackRabbit cannot be recharged directly from a USB port. If charging in a car's 12V DC outlet, only the JackRabbit-approved 12V Ultra Portable Charger may be used. No other 3rd party chargers should be used to charge your JackRabbit!
We also offer a Travel Battery accessory and the RangeBuster Battery, both of which work with all JackRabbit models, so you can instantly swap in more power.
From a dead battery and using the charger included with your bike, a JackRabbit will take at least 3-5 hours to reach full charge. See detailed specs for each bike model and battery accessory for specific charging times.
How do I inflate my JackRabbit’s tires?
How do I inflate my JackRabbit’s tires?
All JackRabbits use bicycle tires and innertubes that require air in them at the proper pressure to ensure safe and comfortable riding, and maximum range.
In the USA, the common term for the pressure level is “PSI” and the necessary PSI range is shown on the side of the tire. For the tires on most JackRabbits, the accepted pressure range is 40-65 PSI, but be sure to check the range on the side of the tire.
Use a bicycle pump to inflate to the recommended PSI range. More pressure will reduce rolling resistance and increase range. Less pressure will provide more cushioning and reduced range.
Don’t overinflate or underinflate; proper pressure within the allowed range is important!
How do I insert and secure the handlebars?
How do I insert and secure the handlebars?
- Open the handlebar clamp on the JackRabbit OG that is located on the bike’s handlebar stem hole above the front wheel.
- Hold the handlebars above the bike so that the throttle and brake are on the right side of the bike. Make sure the cabling is in front of the handlebars.
- Insert the handlebars stem into the stem hole.
- Using your finger, press the silver pin on the handlebar stem as it enters the handlebar stem. Feel for the silver pin to click through the hole in the stem base and lift the rubber push button on the handlebar stem base to confirm that the silver button popped through the hole.
- Align the opening on the handlebar clamp with the slot in the stem base. Turn the knob on the handlebar clamp clockwise to tighten and then push the clamp towards the stem to lock in place.
- While opening and closing the clamp, re-adjust the tightening knob as necessary so that it takes moderate pressure to close the clamp with the palm of your hand. The pressure needed to close the clamp should be high enough that it leaves a temporary visible impression on the palm of your hand to close the clamp.
- Open the handlebar clamp on the JackRabbit XG or JackRabbit OG2 that is located on the bike’s handlebar stem hole above the front wheel.
- Hold the handlebars vertically with the throttle side of the handlebar highest in the air. Have all of the cabling in front of the throttle and brake levers.
- With the handlebars vertically oriented with the throttle side of the handlebars at the highest point, insert the handlebars stem into the stem hole and then rotate the handlebars so that the throttle side of the handlebars rotates down and to the right into the riding position.
- You should feel the handlebars following a spiral rotating track and then drop down into place once inserted correctly.
- Align the opening on the handlebar clamp with the slot in the stem base. Turn the knob on the handlebar clamp clockwise to tighten and then push the clamp towards the stem to lock in place.
- While opening and closing the clamp, re-adjust the tightening knob as necessary so that it takes moderate pressure to close the clamp with the palm of your hand. The pressure needed to close the clamp should be high enough that it leaves a temporary visible impression on the palm of your hand to close the clamp.
Check out these videos for more help:
How do I ride my JackRabbit?
How do I ride my JackRabbit?
Our research shows that it takes less than 5 minutes for most people to become comfortable riders on a JackRabbit. But take your time and enjoy the learning process! Watch the quick video below for whichever JackRabbit you have, or read the steps below.
For JackRabbit OG: Watch this video to learn how to ride a JackRabbit OG
For JackRabbit OG2 & OG2 Pro: Watch this video to learn how to ride a JackRabbit OG & OG2
For JackRabbit XG & XG Pro: Watch this video to learn how to ride a JackRabbit XG
For JackRabbit MG Doble, Renegade, & Cargo: Watch this video to learn how to ride a JackRabbit MG Doble, Renegade, & Cargo
JackRabbit Riding Steps:
-
First, check to make sure that:
- Your footrests are flipped down
- The handlebars are firmly secured in the riding position
- The brake (OG & OG2) or brakes (XG, XG Pro & MG models) are working
- The tires are inflated to the correct PSI range
- The seat is in the right position for you
- Now, sit on the JackRabbit in the riding position with both feet firmly on the ground and both hands on the handlebars.
- Grip the handlebars with both hands and make sure you are familiar with the brake lever on the right.
- For your first ride, try coasting before applying electric power. On nice flat ground, like an empty parking lot, push off with one foot, and as you start to coast, let your legs hang for a bit, then lift and rest your feet on the footrests. Coast a bit more and try steering left and right. Test the brake a few times. Sit comfortably back and try not to lean too far forward on the handlebars. Relax, coast, and glide!
- Once you’re comfortable coasting and gliding, it’s time to turn on the power.
- For JackRabbit OG, OG2, OG2 Pro, XG, and XG Pro: While stationary, press the power button on the right side of the handlebars above the thumb throttle. The LEDs (JackRabbit OG) or display (JackRabbit OG2, OG2 Pro, XG, XG Pro) on the throttle should turn on, showing that power is activated and what the battery level is.
- For JackRabbit MG Doble, Renegade, & Cargo: While stationary, press the power button on the left side of the handlebars on the front of the display. The display should turn on, showing that power is activated and what the current battery level is.
- Before using the throttle, push off with one foot to start moving forward and place both feet on the footpegs. Once you are coasting and moving forward, for OG, OG2, OG2 Pro, XG, and XG Pro, use your right-hand thumb to slowly press the throttle. For MG Doble, Renegade, & Cargo, use your right wrist to roll the throttle toward you to accelerate and roll the throttle away from you to decelerate. The more throttle you use, the more power will be applied, so start slow and get used to the power as you ride.
Have fun! When you are finished with your ride, remember to turn off the power button to save battery. And always wear a helmet when riding!
How do I turn my JackRabbit on and off?
How do I turn my JackRabbit on and off?
Press the power button above or near the throttle to turn on your JackRabbit.
For JackRabbit OG: Press the gray button directly above the thumb throttle. When it’s on, the battery-level LED lights will be on. When it’s off, or the battery is depleted, the LED lights will be off.
For JackRabbit OG2: Press and hold the power button for about one to two seconds, located on the top of the display. When it’s on, the display will show ride information. When it’s off or the battery is depleted, the display will be blank.
For JackRabbit XG, OG2 Pro & XG Pro: Find the middle button with the international power symbol (⏻) next to the display. Press and hold for about one second. When it’s on, the display will show ride information. When it’s off or the batteries are depleted, the display will be blank.
For JackRabbit MG Doble, Renegade, & Cargo: Find the recessed button with the international power symbol (⏻) under the display. Press and hold for about one second. When it’s on, the display will show ride information. When it’s off or the batteries are depleted, the display will be blank.
When you are done riding, make sure to turn the power button off to save battery power. JackRabbit OG2, OG2 Pro, XG, XG Pro, and MG models will automatically power off after a few minutes, but the JackRabbit OG will not turn itself off.
How do I control the speed of my JackRabbit?
How do I control the speed of my JackRabbit?
For JackRabbit OG, OG2, OG2 Pro, XG, and XG Pro: On the right side of the handlebar is a thumb throttle that controls the speed of your JackRabbit. Your speed will depend on how far down you press this throttle. The JackRabbit will go faster the harder you press down. Make sure to press the throttle lightly at first to get used to your speed.
For JackRabbit MG Doble, Renegade, & Cargo: On the right side of the handlebar is a twist throttle that controls the speed of your JackRabbit. Your speed will depend on how much you twist the throttle toward yourself. The JackRabbit will go faster the more you twist the throttle. Make sure to twist the throttle only a small amount at first to get used to your speed.
To maximize range, we recommend pressing the throttle just enough to reach a comfortable cruising speed, rather than holding it fully open all the time. Press, then release and coast.
What’s the difference between the JackRabbit OG, OG2, OG2 Pro, XG, XG Pro, MG Doble, Renegade, & Cargo?
What’s the difference between the JackRabbit OG, OG2, OG2 Pro, XG, XG Pro, MG Doble, Renegade, & Cargo?
You can compare our bike models here, or read below for some basic differences.
JackRabbit OG: The one that started it all. Our most compact bike for grab-and-go portability for all ages. The original micro eBike was designed for simplicity and efficiency. It features a single brake lever on the right side of the handlebars and a basic 3-light LED battery level indicator.

JackRabbit OG2: The OG2 takes our award-winning OG and packs in even more, while still being ultra lightweight, portable, and compact. Like the OG, it has a single brake lever on the right side, but it also includes a digital display for more detailed battery information with a mode select button for more rider control.

JackRabbit OG2 Pro: The OG2 Pro blends the sleek design of the OG2 with the power and range of the XG. Equipped with a robust 500W motor, a larger RangeBuster battery, and Midrise Handlebars, it is built for riders who want more power and more adventure.

JackRabbit XG: The XG features a larger BMX-style frame, a more powerful motor, dual brakes, and more room with more vroom-vroom.

JackRabbit XG Pro: The XG Pro upgrades the XG with a 749W motor, dual RangeBuster batteries, CST Fringe tires, and Highrise Handlebars. Built to grip it and rip it.

JackRabbit MG Doble: The first lightweight, portable Micro Hauler™ built for two. Full-sized bike muscle with 2-up seating, 48+ miles of range, and folds flat at only 52 lbs.


JackRabbit MG Renegade: A lightweight power monster with a 749W cargo-geared motor, hydraulic brakes, and off-road attitude, all at only 44 lbs.

JackRabbit MG Cargo: The first lightweight, portable Micro Hauler™ electric bike, delivering full cargo-bike capability without the bulk. With a 749W cargo-geared motor and the ability to haul up to 10× its own weight, it handles serious loads while still folding flat.

Adjusting, Using, and
Maintaining Your JackRabbit
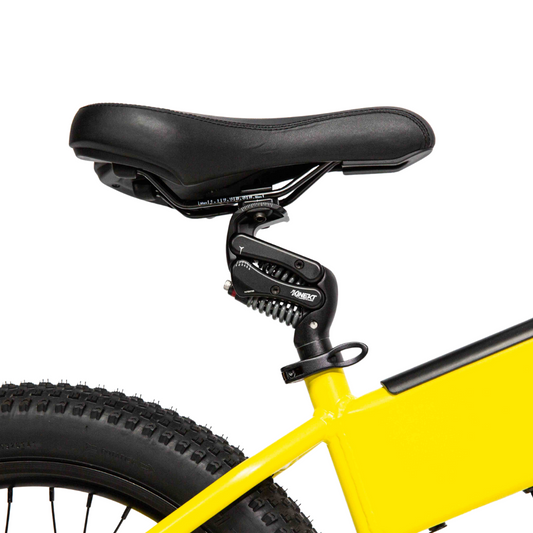
How do I adjust the seat on my JackRabbit?
How do I adjust the seat on my JackRabbit?
Note: The tandem seat on the MG Doble cannot be adjusted. Below are instructions on how to adjust your seat on all OG and XG models, as well as the MG Renegade & MG Cargo.
To adjust your seat or saddle, find the quick-release lever just below your seat cushion.
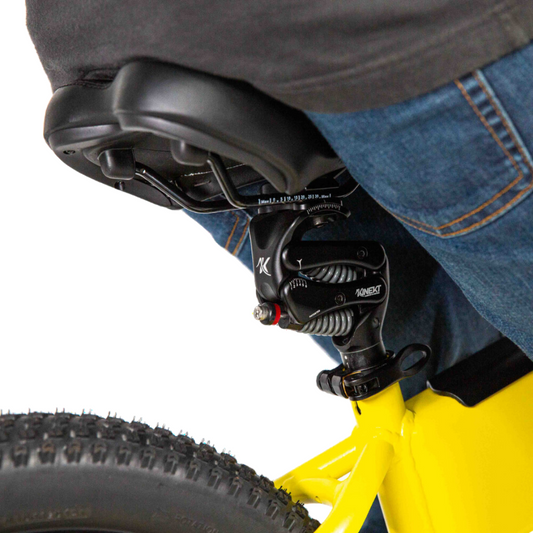
Flip open the quick-release lever and move your seat up or down. The ideal seat height should allow both feet to be flat on the ground when seated. You should also be able to walk onto the JackRabbit from behind with the seat going between your thighs and just below your buttocks. Unlike a traditional bike, you don’t need to throw your leg over the frame of a JackRabbit.
Clamp down the quick-release lever when your seat is at the right height.
If you find that your seat slips down when you sit on it, it’s likely because the quick-release lever needs to be tightened.
To tighten the quick-release lever, flip it open. While open, adjust the knob on the quick-release band to increase the pressure when closing the lever. The pressure should be set so that it is not effortless to close the lever, but it does not need to be so high that it is difficult to close.
How do I know if my JackRabbit is fully charged? Or low on battery?
How do I know if my JackRabbit is fully charged? Or low on battery?
You can check your battery level by turning on the power button located on the battery gauge found on your handlebars, above the throttle.
For JackRabbit OG: The OG is fully charged when all three battery lights are on (red, yellow, and green). As you lose charge, these battery lights will start to disappear.
For JackRabbit OG2: The OG2 is fully charged when all 5 battery icons at the bottom of the display are filled. As you lose charge, these battery icons will start to disappear. The last battery icon flashes when undervoltage occurs.

For JackRabbit XG, XG Pro, & OG2 Pro: The bike is fully charged when all 4 battery icons on the right side of the display are filled. As you lose charge, these battery icons will start to disappear. The last battery icon flashes when undervoltage occurs.

For JackRabbit MG Doble, Renegade, & Cargo: The bike is fully charged when all 5 battery icons at the top left of the display are filled. As you lose charge, these battery icons will start to disappear. The last battery icon flashes when undervoltage occurs.

When you see only the red light on the JackRabbit OG, or only one battery icon remaining on JackRabbit XG, OG2, Pro, or MG models, we recommend charging your JackRabbit as soon as possible or swapping in an extra battery.
To charge your JackRabbit battery, see here.
To swap in a new battery, see here.
How do I lock my JackRabbit?
How do I lock my JackRabbit?
You can lock your JackRabbit with a typical bike lock, including the locks we offer on our Accessories page.
The best place to lock your JackRabbit is to run the lock through the closed-loop “triangle” portion of the rear of the bike, through the frame triangle from the seat tube to the back tire. We recommend positioning the lock through the closed half-loop metal frame near the rear tire.
However, where allowed, we encourage folding your JackRabbit into Flat Mode and bringing it indoors with you instead of locking it outside. Most places will allow you to walk your JackRabbit inside, given its small and discreet design.
See here for how to easily switch it into Flat Mode so you can roll it effortlessly and conveniently indoors.
You can also carry it inside if needed. See here for how to do so.
How can I best maintain my JackRabbit?
How can I best maintain my JackRabbit?
Here are some tips to keep your JackRabbit in top condition:
Tire Pressure: Regularly check your tire PSI. Check the side of your tire for the recommended tire pressure, which differs by JackRabbit model. If your PSI is lower than the recommended, use a hand-operated or electric air pump with a pressure gauge to add air.
Cleaning: Wipe down your JackRabbit with a damp towel to keep it clean and free of dirt and debris.
Bolt Tightness: Periodically check the tightness of all bolts on your JackRabbit, including the footrest bolts, to ensure everything remains secure.
Battery Maintenance: Store your battery in a cool, dry place, ideally at a charge level of around 50-60%. Avoid leaving it fully charged or fully discharged for extended periods. Every few months, fully discharge and recharge the battery to help maintain cell balance and prolong battery life.
By following these simple steps, you'll help ensure your JackRabbit stays in excellent working order for years to come.
Can I ride my JackRabbit off-road, in snow or on the beach?
Can I ride my JackRabbit off-road, in snow or on the beach?
JackRabbits are great for light off-road riding like hard-packed dirt, grass, and smooth gravel paths. They handle those conditions well and make for a fun, easy ride.
That said, they’re not built for rough terrain like rocky trails, large roots, drops, or jumps. With smaller wheels and no suspension, those conditions can put extra stress on the bike and its components over time.
Beach riding can work on firm, packed sand, but loose or deep sand is not recommended.
Similarly, JackRabbits with all-terrain or off-road tires can be ridden on packed snow, but icy conditions are not recommended, as traction becomes very limited and performance can drop off quickly.
If you stick to smoother surfaces, your JackRabbit will stay happy, and you’ll have a much better ride.
Is the JackRabbit waterproof?
Is the JackRabbit waterproof?
The JackRabbit is IPX4 water resistant, which means it can handle splashes of fresh water from any direction.
Your JackRabbit can handle a freshwater rainshower but it should never be immersed in water.
Avoid any splashes of salt water and NEVER EVER immerse the JackRabbit in salt water. Immersing batteries in salt water can be dangerous and should be strictly avoided.
How can I clean my JackRabbit?
How can I clean my JackRabbit?
Keeping your JackRabbit clean is quick and easy. We recommend wiping it down with a soft, damp cloth using warm water and a mild soap if needed. For light dust or everyday touch-ups, baby wipes work surprisingly well too.
A few pro tips to keep your rabbit hopping happily 🐇⚡
- Avoid spraying it directly with a hose or pressure washer, as water can work its way into electrical components.
- Use a soft brush or cloth around the wheels, frame, and hard-to-reach spots.
- Dry it off after cleaning, especially around the battery area and charging port.
- Make sure the charging port cover is fully closed before riding again.
With regular wipe-downs, your JackRabbit will stay looking sharp and ready for the next adventure.
Can I adjust the handlebar height?
Can I adjust the handlebar height?
No, the stock handlebar height on your JackRabbit is not adjustable. However, we do offer various handlebar height options available for all JackRabbit models on our Accessories page.
We designed the stock handlebar height and distance to work for a wide range of riders, helping to keep the JackRabbit’s design as light and efficient as possible. With our Midrise and Highrise options, you can further customize your ride to suit your preferences.
When riding, sit back on the seat, relax your arms and shoulders, and enjoy the ride. There’s no need to hunch your shoulders or lean heavily on the handlebars, as both can negatively affect handling and your overall riding experience.
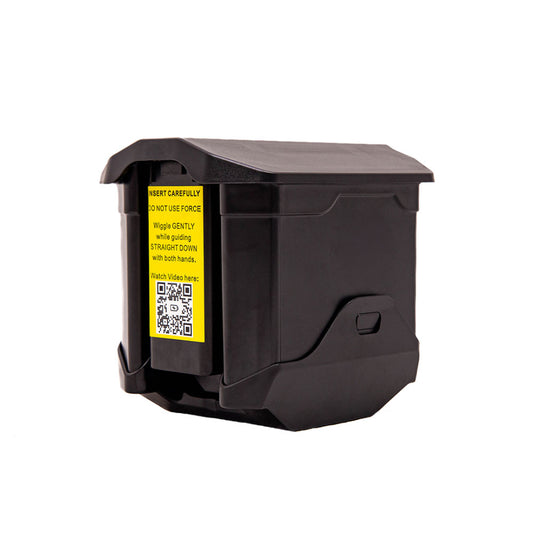
How do I install, remove, or swap out my battery?
How do I install, remove, or swap out my battery?
JackRabbits come with batteries already installed. You can charge your battery without needing to remove it as described here.
You only need to remove a battery if:
- You have a spare battery and want to swap out a full one for a depleted one.
- You are checking your JackRabbit as luggage on an airplane and need to remove the battery to bring it in your carry-on.
To remove a battery, you’ll need to unlatch it using the battery latch under the frame. Depending on your JackRabbit model, you’ll either use a key or a latch knob as follows:
For JackRabbit OG: Most JackRabbit OG models use a barrel key to lock the battery in place. Insert the barrel key that came with your JackRabbit underneath the frame, then rotate the key 90 degrees. It should rotate easily. If it doesn’t, gently jiggle and finesse it. No hard force is needed.
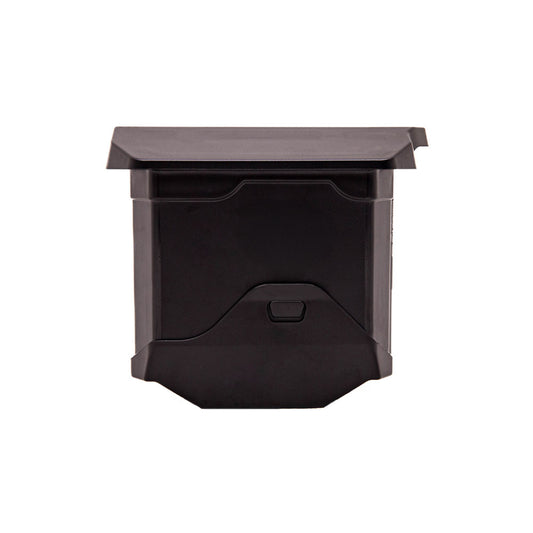
For JackRabbit XG, OG2, OG2 Pro, XG Pro, MG Doble, Renegade, & Cargo: These models use a latch knob to secure the battery in the frame. When the latch is oriented 90 degrees to the frame, the battery is secured. When the latch is rotated so the knob is aligned with the frame, the battery is unlatched and can be removed.
Once unlocked or unlatched, remove or insert the battery evenly with two hands. Do not force it in. It should slide in easily.
Once the battery is inserted, rotate the key or latch knob 90 degrees in the opposite direction to lock it in place.
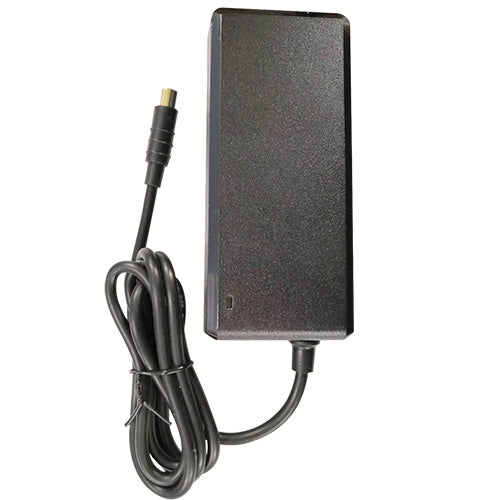
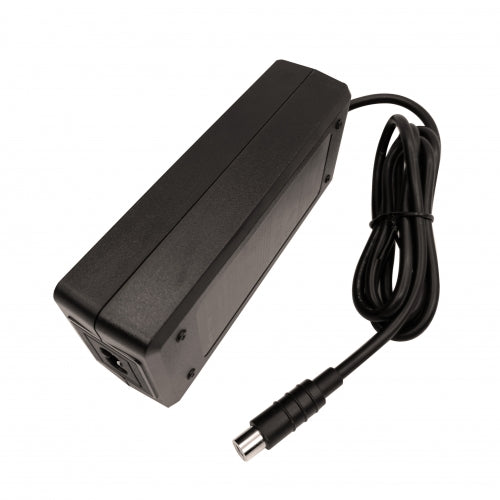
To charge an extra battery outside of your JackRabbit, simply insert the adapter that comes with your charger directly into the battery. When the light on the charger changes from red to green, the battery is fully charged.
Use only the official JackRabbit Extra Battery accessory or RangeBuster Battery, along with the official JackRabbit charger that came with your bike or was purchased directly from JackRabbit. We cannot guarantee the effectiveness or safety of third-party accessories.
Please watch this video if you need more help. This video is for JackRabbits that use a key to lock the battery, but it applies to all JackRabbit models.
Installing and Adjusting
Accessories
MG Cargo Accessories
& Compatibility
What types of products are compatible with the mounting holes on the front forks, downtube, and seat tube of JackRabbits?
What types of products are compatible with the mounting holes on the front forks, downtube, and seat tube of JackRabbits?
JackRabbit models use common threaded accessory mounting points similar to standard bottle cage and utility mounts.
These mounting points may support:
- Front baskets
- Bottle cages
- Pumps
- Tool kits
- Lock mounts
- Utility brackets
- Small bags or storage accessories
Front Basket Note: The mounting hole on the fork just above the front wheel, along with the fork-mounted bottle cage mounts just below the frame, can be used to install front baskets. This setup works with options like the Blackburn Front Basket and many other universal-style baskets that use adjustable hardware.
Always verify bolt length, frame clearance, and safe load limits before installation.
Down Tube: Standard threaded mounts that may support bottle cages, pumps, tool kits, lock mounts, or small storage accessories, depending on fitment.

Fork: Threaded fork mounts may support front baskets, cargo cages, bottle cages, or utility brackets, depending on the accessory design.

Seat Tube: Depending on model and available clearance, seat tube mounts may support bottle cages, compact bags, pumps, or other lightweight accessories.

What panniers are compatible with the rear rack of the MG Cargo?
What panniers are compatible with the rear rack of the MG Cargo?
The MG Cargo rear rack uses common bicycle industry pannier rail sizing and is compatible with many hook-style pannier systems.
We have tested select options, and many others may also work depending on mounting style, hook dimensions, and cargo clearance.
Examples may include:
- Ortlieb panniers
- Universal hook-mount panniers
- Commuter and cargo side bags with adjustable rail hooks
Always compare accessory hardware to published rack dimensions before purchase.


What types of baskets are compatible with the MG Cargo and other JackRabbit?
What types of baskets are compatible with the MG Cargo and other JackRabbit?
Many baskets designed for standard rear racks, front racks, or universal clamp systems may be compatible depending on the model.
Examples may include:
- BiKASE basket systems
- Universal rear rack baskets
- Folding cargo baskets
- Front utility baskets where supported
Always verify mounting style, dimensions, and weight limits before use.

* Use these top platform dimensions when selecting baskets, crates, or rack-top cargo systems. Measurements shown in millimeters.
What passenger options are available for MG Cargo?
What passenger options are available for MG Cargo?
Passenger accessory compatibility varies by model, rack design, and intended use.
Examples may include:
- JackRabbit Copilot kit for mini passengers
- Thule Yepp child carrier systems on approved mounting points
- Universal passenger cushions or seat pad accessories
Always follow the published rider and cargo weight limits.
* Accessory passenger pads or child-seat systems must match rack dimensions and weight limits. Measurements shown in millimeters.
What cargo trailer options are available on JackRabbit?
What cargo trailer options are available on JackRabbit?
Many universal bicycle cargo trailers may be compatible depending on hitch style, axle hardware, and turning clearance.
Examples may include:
- Burley cargo trailers
- Other universal tow-behind cargo trailer systems
Customers should confirm hitch compatibility before use.
JackRabbit OG
Technical Specifications
The front wheel seems to be locked in place backwards. How can I release it?
The front wheel seems to be locked in place backwards. How can I release it?
The JackRabbit OG has a feature that allows the front wheel to be locked into storage mode so it doesn’t turn or flop around when lifting to put the bike in a trunk, in the Air-Sea-Land Travel Bag, etc.
When the front wheel is rotated 180 degrees, there is a lock spring that automatically pops through a hole in the front of the bike to hold the wheel in place.
To unlock the front wheel so you can turn the front wheel 180 degrees back to Ride Mode, first locate the hole and the rubber button on the lower right area of the handlebar head tube, right above the front wheel fork.
Then manipulate the rubber button into the hole and press the button to release the wheel lock.
It may take a bit of jiggling to release it.
Once released, rotate the front wheel 180 degrees, insert and properly secure the handlebars, and you’re ready to ride!
Which version of JackRabbit OG do I have?
Which version of JackRabbit OG do I have?
If you own a JackRabbit OG and need replacement parts or are interested in particular accessories, you may need to know which version of the OG you have.
If purchased after November 2021 and your Brake Lever looks like the one on the left, you have an OG1.0. If your Brake Lever looks like the one on the right, you have an OG1.1.

If you purchased your JackRabbit before November 2021, you have a JackRabbit JR2. There are a few important differences to be aware of:
- The power button is located on the left side of the frame. It is a red colored switch and when pressed up (I) the power is on. When pressed down (O), the power is off.
- The battery level indicator is located on the battery itself. On the top of the battery, press the button in the middle of the battery and the surrounding LED lights will indicate the battery level. When all four lights are lit (three green and one red) = 75-100%, 3 = 50-75%, 2 = 25-50%, and 1 (red only) = 0-25%.
- The charging port is located on the top of the frame below the seat.
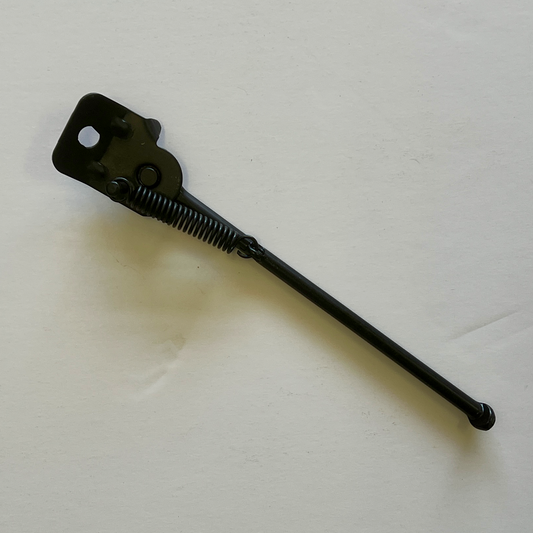
- The kickstand is located on the opposite side and moves in the opposite direction.
- The front wheel will not lock in place when rotated 180 degrees.
Where can I find a digital version of the OG User Guide?
Where can I find a digital version of the OG User Guide?
What is the JackRabbit OG’s maximum weight limit?
What is the JackRabbit OG’s maximum weight limit?
For the best experience, we recommend a maximum load weight of 240 lbs (meaning, the weight of the driver, accessories, plus anything that you might be carrying).
What is the maximum rider height for the JackRabbit OG?
What is the maximum rider height for the JackRabbit OG?
The JackRabbit OG will perform best for those 6’2” and under.
How much does the JackRabbit OG weigh?
How much does the JackRabbit OG weigh?
How fast does the JackRabbit OG go?
How fast does the JackRabbit OG go?
How far can the JackRabbit OG travel on one charge?
How far can the JackRabbit OG travel on one charge?
A fully charged JackRabbit OG can travel an average of 10+ miles on one charge.
However, this range is subject to vary depending on road conditions, applied power, weather conditions and temperature, as well as the total load weight (i.e. the weight of the rider, accessories, plus anything that you might be carrying).
How well does JackRabbit OG climb hills?
How well does JackRabbit OG climb hills?
Hill climbing with a JackRabbit depends on the power available, the rider's weight, and the steepness of the incline.
Here's how each model performs:
JackRabbit OG and OG2:
Both the OG and OG2 models deliver 350 watts of power to the rear wheel with a fully charged battery.
For a rider weighing 200 lbs, these models can climb hills with up to a 14% grade at a speed of 5 mph, which is about double the speed of walking uphill.
For a rider weighing 150 lbs, these models can climb hills with up to an 18% grade at 5 mph.
The JackRabbit design also allows for "kick-scooting" with one leg while ascending a hill to give it an extra boost if needed.
JackRabbit XG:
The XG model has a more powerful motor, making it better suited for hill climbing and descending.
A rider weighing 200 lbs can climb hills with up to a 17% grade at a speed of 5 mph.
A rider weighing 150 lbs can climb hills with up to a 22% grade at 5 mph.
On less steep hills, the XG can carry an average-sized rider at speeds ranging from 8-16 mph.
If you frequently ride in hilly areas, the JackRabbit XG offers increased performance and hill-climbing ability, making it a great choice for tackling steeper inclines.
How long does it take to charge the battery of a JackRabbit OG?
How long does it take to charge the battery of a JackRabbit OG?
From a dead battery, it will take the JackRabbit OG about 3 hours to reach full charge when using the charger that came with the JackRabbit OG.
We also offer an Extra Battery accessory and an Ultra Fast Charger.
What are the dimensions of the JackRabbit OG in Ride Mode?
What are the dimensions of the JackRabbit OG in Ride Mode?
48” long x 21” wide x 39” high